Newsletter Samples/Newsletter Templates
With BACKCLICK, you can prepare samples or templates that may be used whenever you create a new newsletter. If your newsletter always appears in the same basic layout, using these templates will save you a great deal of time.
You will find instructions for the administration of the samples under “Newsletter Editorial Staff -> Newsletter Samples”. There you can save both text and HTML samples.
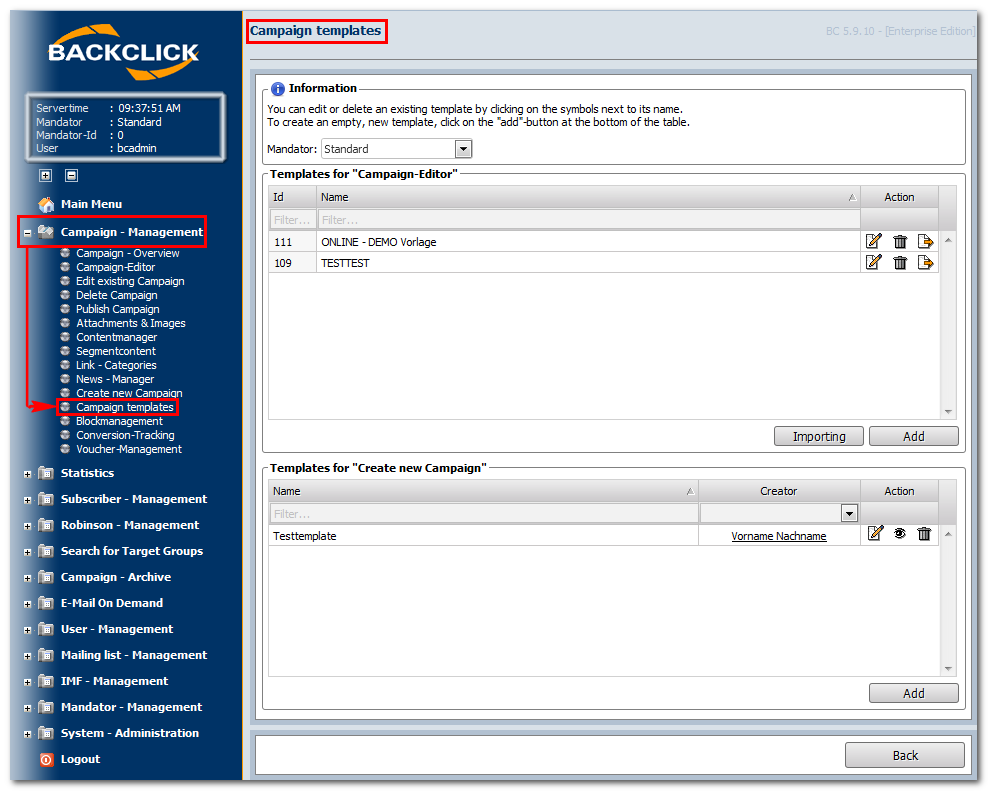
Abb. 11.2 - Vorlagen Übersicht
Create Newsletter Template
Templates that consist of blocks can be created here. Please read Chapter “Blocks and Templates” for further information on how to create these blocks. These blocks are combined in a template, and may be joined together differently for every newsletter. To create a template, click on the "Add" -button. This will open the following input mask:
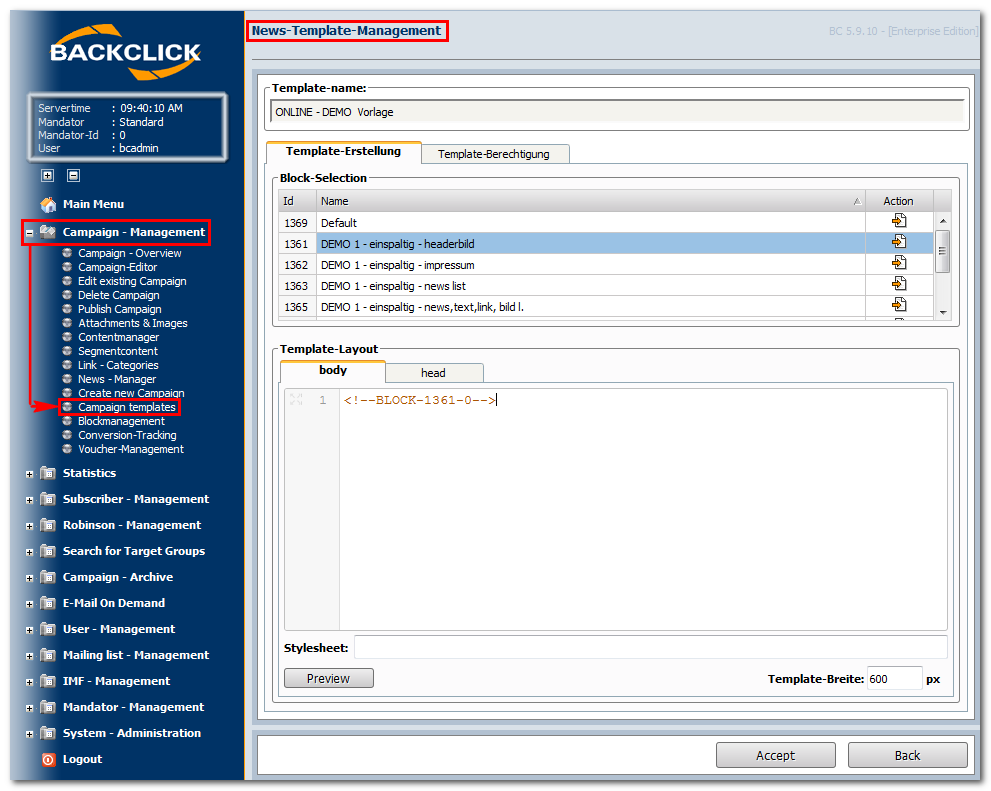
Abb. 11.2.1 - Erstellung eines Templates
Template Name
First, choose a name for the template, and enter it into the input box “Template name”.
Create a template/Layout of the template
While you are constructing the template, all the component blocks that have already been created will be listed. You can select and assign any or all of these blocks to your template. This assignment is to must be made in the layout of the template BODY. Every template starts with the following TAG: <div id="dragableElementsParentBox" style="width:610px;"></div>. This must never be erased at any time, because this TAG defines the frame of the template. The template cannot be displayed without this definition. To add a block to the template (in our example, it is the BACKCLICK Header), click on the -"Action"-symbol after the block that is to be added. Within the BODY, the following TAG will be shown: <!--BLOCK-77-0-->. This block is then integrated into the defined frame of the template: <div id="dragableElementsParentBox" style="width:610px;"><!--BLOCK-77-0--></div>. To see whether you have selected the right template, click on the "Preview"-button. This will open a separate window with the preview of your templates, and their current contents.
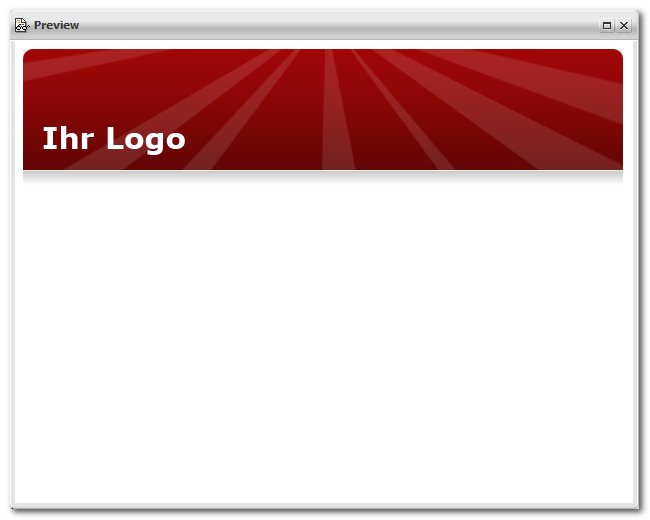
(Preview of our example block)
You can design a complete newsletter, and easily change it again and again, thanks to the integrated “Drag & Drop” editor.
PLEASE NOTE: THIS TAG IS NOT TO BE ERASED AT ANY TIME: <div id="dragableElementsParentBox" style="width:610px;"></div> The blocks for your newsletter must be placed in between this TAG: <div id="dragableElementsParentBox" style="width:610px;"><!--BLOCK-77-0--></div>.
The “HEAD”-TAG is optional. These details are not visible, and are only relevant later if JAVA or a style sheet is used. The value “610” defines the complete width of the HTML newsletter, but this may be changed.
Template Authority
All of the mailing lists you have already prepared are listed in the template. Here you may decide which mailing lists this template can be used for. If the check box after a mailing list is marked, everybody who has a right to this mailing list can see and use the template. This is not valid for all of the unselected mailing lists, which are then only visible to the administrator.
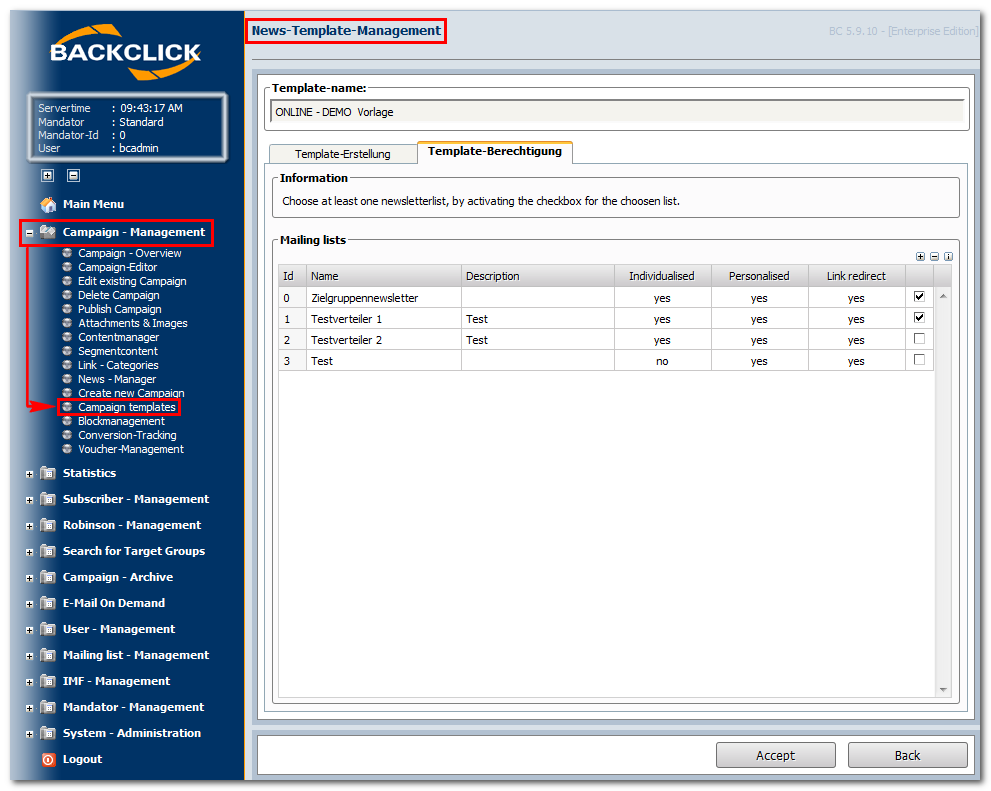
Abb. 11.2.2 - Template Berechtigungen
After you have completed all of the entries and definitions, you may save the template by clicking on the "Accept"-button.
Clicking on the "Back"-button will return you to the main menu “Newsletter Management” .
Creating a sample
Unlike creating a template, this function does not let you select single blocks and put them together for a new template. The
entire HTML code that is needed for the newsletter template must be entered. Of course, this is very complicated when it
comes to any changes that should be made. To create a new sample, click on the "Add"-button, and start by naming
the sample. Now, you must insert the whole HTML code that is needed for the sample. You may request a preview
("Preview" ) which shows you the results of your HTML code if you do not want to change anything. You may now use the
samples you have created. These will be listed under “Newsletter - Editorial Staff -> Write Newsletter”.
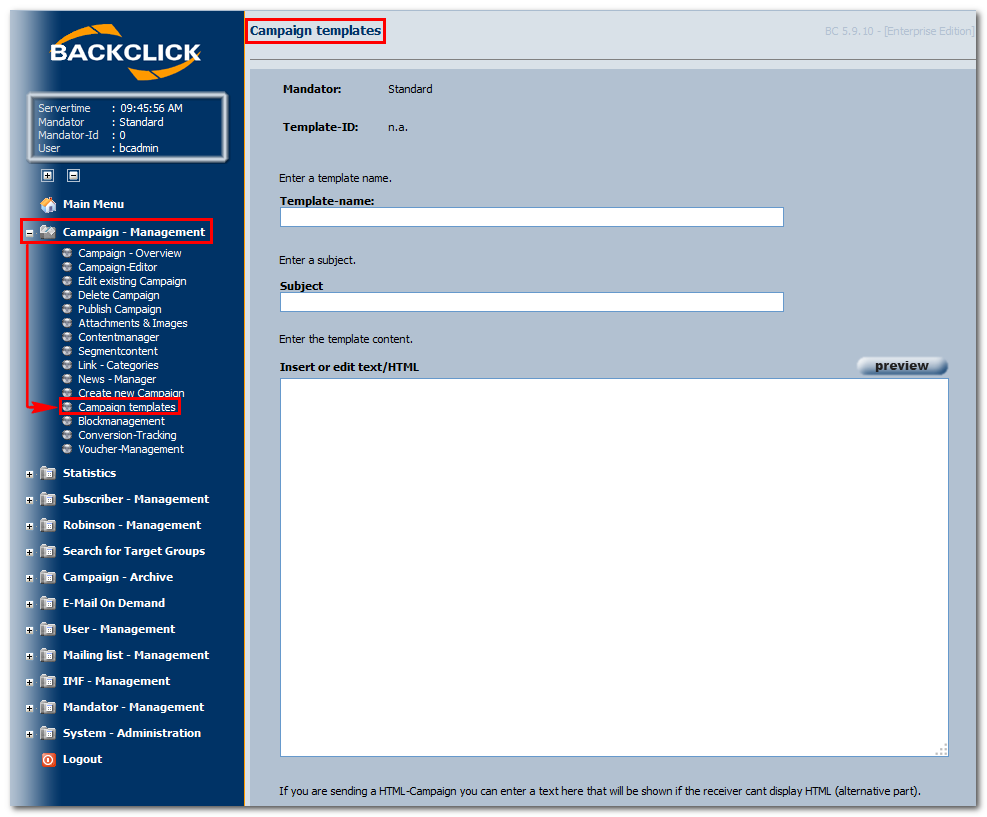
Abb. 11.2.3.1 - Vorlagen Übersicht
Alternative text
In case the e-mail client of a subscriber will not accept HTML e-mails, you can enter an alternative text here. That way, every
subscriber can read the contents of the e-mail. Please make sure that only the text actually entered will be shown on the
e-mail later here.
Mailing lists
Finally, you must assign the sample to a mailing list. All the mailing lists you have a right to will be shown. The sample must
be assigned ONLY to these mailing lists. Use the arrow badges to assign samples to designated mailing lists.
Change sample
To change an existing sample, you must click on the "Edit"-symbol. This button is at the end of every entry line. You can change
the name, the contents, and the rights to a sample while in this mode. Click on the "Save"-button afterwards to store the
changes.
Erase sample
To erase a sample, click on the "Delete"-symbol. This will display a safety query, which you can confirm by using the
"Yes"-button if you do not plan to use the sample again.